How to Build a GPU Workstation for Deep Learning (2026 Guide)
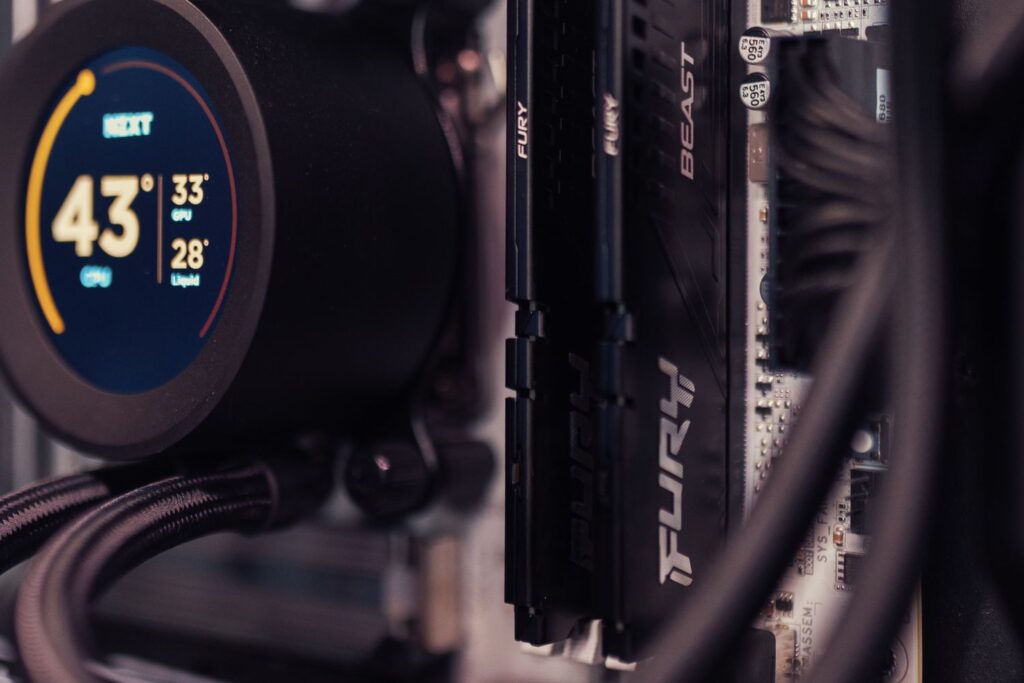
Building a GPU workstation for deep learning comes down to five decisions: a GPU with enough VRAM for your models, a CPU with enough PCIe lanes to feed it, system RAM of roughly twice your total VRAM, NVMe storage fast enough that data loading never starves the GPU, and a power supply with genuine headroom. Get those right and the rest of the build is ordinary PC assembly. This guide explains what to buy and why, gives example configurations by budget, covers when multi-GPU is worth the trouble, weighs building against pre-built vendors and cloud rental, and finishes with the software stack that turns a pile of parts into a training machine.
Disclosure: this article contains affiliate links. If you buy through them we may earn a small commission at no extra cost to you.
- Why (and When) to Build a Deep Learning Workstation
- Component Overview at a Glance
- GPU: VRAM Is the Real Budget
- CPU: PCIe Lanes Over Clock Speed
- RAM: The 2× VRAM Rule
- Storage: Fast NVMe So the GPU Never Waits
- Power Supply: Buy Headroom, Not Drama
- Case and Airflow: Room for 3-Slot GPUs
- Example Builds by Budget
- Multi-GPU: When It’s Worth It
- Build vs Pre-Built vs Cloud
- Software Stack: Ubuntu, Drivers, CUDA, Docker
- FAQ
Why (and When) to Build a Deep Learning Workstation
A local workstation makes sense when you train or fine-tune models regularly. Cloud GPUs are perfect for bursty, occasional work, but if a machine would run experiments most days, the hardware typically pays for itself within a year of equivalent on-demand rental. You also get zero data-egress friction, no idle-instance anxiety, and a machine that doubles as a fast development box.
It does not make sense if you need 80 GB-class accelerators for large-scale training a few times a year — rent those. We compare the rental route in our guide to cloud GPU providers, and if your target is inference at the edge rather than training at a desk, a Jetson Orin Nano is a very different (and far cheaper) conversation.
Component Overview at a Glance
| Component | What to look for | Common mistake |
|---|---|---|
| GPU | VRAM first (16–24 GB minimum for serious work), recent architecture, adequate cooling design | Buying by gaming benchmarks instead of VRAM capacity |
| CPU | Enough PCIe lanes for full x16 (or x8/x8 for two GPUs), 8+ cores for data preprocessing | Pairing two GPUs with a consumer CPU that chokes them to x4 |
| RAM | Roughly 2× total VRAM; 64 GB is the sensible floor | Skimping to 32 GB and hitting swap during data loading |
| Storage | Fast NVMe (PCIe 4.0+), 2 TB or more for datasets and checkpoints | Putting datasets on a SATA drive and blaming the GPU for slow epochs |
| PSU | 1000 W+ for a single high-end GPU, 80+ Gold or better, ATX 3.x with native 12V-2x6 | Sizing to average draw and ignoring transient power spikes |
| Case & cooling | Room for 3–3.5-slot cards, unobstructed front intake, mesh panels | Beautiful glass box with the thermals of a greenhouse |
GPU: VRAM Is the Real Budget
The GPU is where deep learning lives, and VRAM is the constraint you will hit first. Model weights, optimizer states, activations and your batch all have to fit in GPU memory; when they don’t, you either shrink the batch, add gradient checkpointing, or simply cannot run the model. Compute speed determines how long training takes — VRAM determines whether it runs at all.
Rough working guidance for 2026: 12 GB is the entry point for learning and small models; 16 GB handles most computer-vision work and small-LLM fine-tuning with LoRA; 24 GB is the sweet spot for serious solo work (7B–13B fine-tunes, diffusion training); 32 GB and up is where mid-size LLM work becomes comfortable. Prefer recent architectures — newer tensor cores with FP8/FP4 support and larger memory bandwidth matter more than raw CUDA-core counts.
Choosing the specific card is a full topic of its own, so we keep a dedicated, regularly updated comparison in our guide to the best GPU for deep learning. For this build guide, the takeaway is: decide your VRAM tier first, then let the rest of the parts list follow from the card’s power draw and physical size.
CPU: PCIe Lanes Over Clock Speed
The CPU’s job in a training rig is to feed the GPU: decode images, tokenize text, augment samples, and push batches over PCIe. That means two things matter more than peak clock speed — core count and PCIe lanes.
Mainstream desktop CPUs (AMD Ryzen, Intel Core) expose roughly 20–28 usable PCIe lanes. That is fine for one GPU at x16 plus an NVMe drive. The moment you plan two GPUs, lanes get split — x8/x8 on good boards, which is acceptable, or x16/x4 on cheap ones, which is not. For 2+ GPUs or heavy NVMe arrays, workstation platforms like AMD Threadripper (and Threadripper PRO) or Intel Xeon-W offer 48–128 lanes and quad-to-octa-channel memory, at a significant platform premium.
Practical rule: single GPU → a modern 8–12-core desktop CPU is plenty. Dual GPU → still viable on desktop if the motherboard supports x8/x8 bifurcation. Three or more → you are building on Threadripper/Xeon whether you like it or not. Also budget one CPU core (roughly) per active DataLoader worker — vision pipelines with heavy augmentation will happily eat 12 cores.
RAM: The 2× VRAM Rule
A dependable rule of thumb: system RAM should be at least twice your total VRAM. A 24 GB GPU wants 48–64 GB of RAM; a dual-24 GB rig wants 96–128 GB. The reason is unglamorous: data loading, caching, and CPU-side copies of tensors. PyTorch DataLoaders with several workers each hold batches in host memory, pinned-memory staging buffers double some of that, and preprocessing frameworks love RAM caches. When host memory runs out, the OS swaps and your expensive GPU idles at 30% utilization.
In 2026, 64 GB of DDR5 is the sensible floor for a serious build and the price difference from 32 GB is small in the context of the whole machine. Speed matters far less than capacity — do not pay a premium for exotic overclocked kits; standard JEDEC-speed DDR5 in a dual-channel (or on workstation boards, quad-channel) configuration is what you want. ECC is worth having on Threadripper PRO/Xeon builds that run week-long jobs, optional elsewhere.
Storage: Fast NVMe So the GPU Never Waits
Slow storage is the most common hidden bottleneck in home-built rigs. An epoch over a few hundred gigabytes of images means millions of small random reads — exactly the workload where SATA SSDs and hard drives collapse. A PCIe 4.0 NVMe drive delivers 5–7 GB/s sequential and, more importantly, vastly better random I/O, keeping DataLoader workers fed.
Capacity plan: datasets grow, and model checkpoints are enormous — a single fine-tune run can drop 50–100 GB of checkpoints without trying. 2 TB is the realistic minimum for the primary drive; a sane layout is one 2 TB NVMe for OS + active datasets + checkpoints, plus a second large drive (NVMe or even a big HDD) for cold dataset storage. Skip PCIe 5.0 premiums unless the price is close — training pipelines rarely saturate 4.0.

- MEET THE NEXT GEN: Consider this a cheat code; Our Samsung 990 PRO Gen4 SSD helps you reach near max performance with lightning-fast speeds; Whether you’re a hardcore gamer or a tech guru, you’ll get power efficiency built for the final boss
- REACH THE NEXT LEVEL: Gen4 steps up with faster transfer speeds and high-performance bandwidth; With a more than 55% improvement in random performance compared to 980 PRO, it’s here for heavy computing and faster loading
- THE FASTEST SSD FROM THE WORLD'S FLASH MEMORY BRAND: The speed you need for any occasion; With read and write speeds up to 7450/6900 MB/s you’ll reach near max performance of PCIe 4.0 powering through for any use
- PLAY WITHOUT LIMITS: Give yourself some space with storage capacities from 1TB to 4TB; Sync all your saves and reign supreme in gaming, video editing, data analysis and more
- IT’S A POWER MOVE: Save the power for your performance; Get power efficiency all while experiencing up to 50% improved performance per watt over the 980 PRO; It makes every move more effective with less consumption


- SPEED UP PROJECTS. Launch creator applications fast with uncompromising PCIe 4.0 read speeds up to 7,100MB/s,[2] (1TB and 2TB[1] models) and write speeds up to 6,700MB/s[2] (1TB[1]-4TB[1] models).
- CREATE AND STORE MORE. Make more room for your 4K videos and high-resolution images with capacities from 500GB[1] up to 4TB[1] on M.2 2280 built with our trusted 8th generation SANDISK BiCS QLC 3D CBA NAND.
- IT GOES WHERE YOU GO. With an all-new power efficient design, your drive delivers high performance with low power, giving you more time to be productive while on the go.
- UNCOMPROMISED RELIABILITY. With up to 1,200 TBW[3] (4TB[1] model) endurance rating, your drive is designed for creators.
- KEEP YOUR DRIVE UPDATED. Monitor your SSD’s performance and check for updates with the downloadable SANDISK Dashboard application.[5]
Power Supply: Buy Headroom, Not Drama
Modern high-end GPUs don’t just draw a lot of power — they draw it in spikes. Millisecond transients can exceed the card’s rated TDP by 50–100%, and an undersized PSU responds with hard shutdowns mid-epoch, hours into a run. Sizing rule: add up rated component power (GPU TDP + CPU TDP + ~100 W for everything else) and buy a PSU rated at roughly 1.5–2× that number.
For a single 350–450 W-class GPU with a desktop CPU, that lands at 1000 W as the comfortable choice. Dual-GPU builds want 1300–1600 W. Insist on an ATX 3.0/3.1 unit with a native 12V-2x6 (12VHPWR) connector — native cables beat adapters for both safety and cable-management sanity — and 80+ Gold efficiency or better, since this machine may run at high load for days. Never daisy-chain one PCIe cable to two GPU connectors; use separate runs.

- Fully Modular PSU: Reliable and efficient, low-noise power supply with fully modular cabling, so you only have to connect the cables your system build needs.
- Intel ATX 3.1 Certified: Compliant with the ATX 3.1 power standard, supporting PCIe 5.1 platform withstands 2x transient power excursions from the GPU.
- Keeps Quiet: A 120mm rifle bearing fan with a specially calculated fan curve keeps fan noise down, even when operating at full load.
- 105°C-Rated Capacitors: Delivers steady, reliable power and dependable electrical performance.
- Modern Standby Compatible: Extremely fast wake-from-sleep times and better low-load efficiency.

- Fully Modular: Reliable and efficient low-noise power supply with fully modular cabling, so you only have to connect the cables your system needs.
- Cybenetics Gold-Certified: Rated for up to 91% efficiency, resulting in lower power consumption, less noise, and cooler temperatures.
- ATX 3.1 Compliant: Compliant with the ATX 3.1 power standard from Intel, supporting PCIe 5.1 and resisting transient power spikes.
- Native 12V-2x6 Connector: Ensures compatibility with the latest graphics cards with a direct GPU to PSU connection – no adapter necessary.
- Embossed Cables with Low-Profile Combs: Sleek, ultra-flexible embossed cables look great and make installing and connecting the RMx a breeze.
Case and Airflow: Room for 3-Slot GPUs
Flagship GPUs are now 3 to 3.5 slots thick and well over 300 mm long, and unlike a gaming session, a training run holds the card at full load for hours or days. The case is a functional component, not a cosmetic one. Look for: mesh front panel with 2–3 intake fans, clearance for 330 mm+ cards, at least 7 expansion slots (8 if you ever want a second card with a slot of breathing room), and good bottom intake if the GPU exhausts into the case.
Airflow pattern matters more than fan count: front-to-back positive pressure, GPU fed directly by front intakes, CPU on a good tower cooler or 280/360 mm AIO so it doesn’t dump heat onto the card. For multi-GPU, prefer blower-style or hybrid cards where available, and leave an empty slot between open-air cards — two open-air coolers stacked together will throttle each other into the ground.
Example Builds by Budget
Prices move constantly, so treat these as proportion guides rather than shopping lists.
Starter: learn and prototype
A 12–16 GB GPU, 8-core desktop CPU, 64 GB DDR5, 2 TB PCIe 4.0 NVMe, 850–1000 W Gold PSU, airflow-focused mid-tower. Handles CV projects, small transformer fine-tunes with LoRA/QLoRA, and all coursework. The upgrade path is simply a bigger GPU later — which is why the 1000 W PSU is already in the list.
Serious solo: the sweet spot
A 24 GB GPU, 12–16-core CPU, 64–96 GB RAM, 2–4 TB NVMe, 1000 W ATX 3.1 PSU. This is the configuration most independent researchers and ML engineers should build: it fine-tunes 7B–13B models, trains diffusion models, and stays relevant for years.
Lab-grade: dual GPU on a workstation platform
Two 24–48 GB GPUs on Threadripper/Xeon-W with 128–256 GB ECC RAM, 4–8 TB NVMe, 1600 W PSU, full-tower case. At this tier, seriously compare the total against pre-built vendors and a year of cloud spend before committing.
Multi-GPU: When It’s Worth It
Two GPUs are genuinely useful in two scenarios: running independent experiments in parallel (the underrated killer feature — two jobs, zero queue), and data-parallel training that nearly doubles throughput on medium models. They are not a magic way to double VRAM: model-parallel and sharded training (FSDP, DeepSpeed) work but add real complexity and inter-GPU communication overhead.
That communication is the catch. NVLink, which used to bridge consumer cards, is gone from current consumer GPUs — cards talk over PCIe, so peer-to-peer bandwidth is limited and x8/x8 lane allocation becomes the norm on desktop boards. For data-parallel work this is usually fine; for heavy model-parallel work it hurts, which is one argument for professional cards or the cloud. The other catch is thermals and power: two 400 W open-air cards in one box need deliberate slot spacing, aggressive case airflow, a 1600 W PSU — and possibly a word with whoever pays the electricity bill. Many people are better served by one bigger-VRAM GPU than two smaller ones.
Build vs Pre-Built vs Cloud
Building yourself saves roughly 20–35% over equivalent pre-configured machines and teaches you the machine you’ll be debugging anyway. The trade is your time and the absence of a single support contact when something misbehaves.
Pre-built vendors like Lambda, BIZON and System76 ship workstations with validated cooling, warranty on the whole system, and the deep learning stack pre-installed. For a company buying a machine an employee depends on, the premium is often worth it; for a solo practitioner comfortable with a screwdriver, it usually isn’t.
Cloud remains the right answer for spiky workloads, anything needing 80 GB-class accelerators, and multi-node training. The honest math: estimate your GPU-hours per month, price them against on-demand rates in our cloud GPU providers comparison, and if the workstation pays for itself within 12–18 months of realistic usage, build it. Many practitioners land on a hybrid: a 24 GB local card for daily iteration, cloud bursts for big runs.
Software Stack: Ubuntu, Drivers, CUDA, Docker
The de facto standard OS is Ubuntu LTS (24.04 at the time of writing) — it is what NVIDIA validates against and what nearly every tutorial and cluster assumes. Dual-booting beside Windows is fine; WSL2 works surprisingly well but native Linux remains smoother for long training jobs.
Setup order that avoids most pain:
- NVIDIA driver — install from Ubuntu’s official repository (
ubuntu-drivers install) rather than the .run installer; it survives kernel updates. - CUDA toolkit — mostly don’t. Modern PyTorch and TensorFlow wheels bundle the CUDA runtime they need; a system-wide toolkit is only required if you compile custom kernels.
- Docker + NVIDIA Container Toolkit — the cleanest way to manage environments. Pull NGC containers or official framework images and every project gets its own reproducible CUDA/cuDNN combination without touching the host.
- Sanity check —
nvidia-smishows the card; inside your environment,torch.cuda.is_available()returnsTrue; run a short benchmark and watch temperatures under sustained load before trusting the machine with a week-long job.
Add tmux so training survives SSH disconnects, and something like TensorBoard or Weights & Biases for tracking. For more component deep-dives and buying guides, browse the rest of our hardware section.
FAQ
How much VRAM do I need for deep learning in 2026?
16 GB is a workable minimum for computer vision and LoRA fine-tuning of small LLMs; 24 GB is the sweet spot for serious solo work; 32 GB+ if you regularly fine-tune 13B+ models. When in doubt, buy the VRAM tier above the one your current project needs — models only grow.
Is it cheaper to build a deep learning PC or use the cloud?
If the machine trains most days, a local build typically beats on-demand cloud pricing within 12–18 months, and you keep the hardware. For occasional or very large jobs (80 GB-class GPUs, multi-node), cloud wins. Estimate your monthly GPU-hours and do the arithmetic before buying anything.
Do I need two GPUs?
Probably not at first. One larger-VRAM card is simpler, cooler and often more useful than two small ones, because two cards don’t transparently merge their memory. Add a second GPU when you routinely queue experiments or your data-parallel training genuinely scales.
Why is my GPU utilization low during training?
Almost always a feeding problem, not a GPU problem: too few DataLoader workers, datasets on slow storage, insufficient RAM causing swap, or CPU-bound augmentation. Fast NVMe, the 2× VRAM RAM rule, and enough CPU cores exist precisely to keep utilization pinned high.
Last update 2026-10-04. Price and product availability may change.
Recommended: